Friday, June 8, 2012

easy peasy pom pom tutorial!


I spent many hours making pom poms as a child. I cut out rings of cardboard from cereal boxes and wound and wound my little heart out. I made hair ties mainly with them, in school colours and other colours to match outfits, I got orders from friends and many a pom pom I did make. But when I sat down recently to make some, I really didn't feel like all that fiddly winding onto rings. I wanted something quicker and easier that would keep both my children amused with quick results. So I've come up with this little way of making them.

I cut this template out of the bottom of a plastic ice cream container.
the width will be the diameter of your pom pom.
(obviously it doesn't have to be cut perfectly straight to work!)

start by placing a length of your yarn through the gap in the middle
(the rest of my photos show two templates, one on top of  the other
to give a bit of extra strength, it also works just with one)

start winding! Round and round. You'll get the best results
if you try and wind the yarn close together through the middle
of the template.

before you know it, it will be nice and fat! Cut of the other end of the
yarn as above.

now it's time for tying the pom pom off. Bring the two ends
together on one side and tie tightly with a knot. It's helpful if you've
got an extra pair of hands to get the knot nice and tight.
Bring the ends over to the other side and tie a knot on that
side too.

now it's time for cutting! The picture above shows just one
side cut. Cut both and gently pull the pom pom out through
the middle slit. This is where a template made from the ice cream
container is better than cardboard as it's nice and flexible to
get the pom pom out.

now you have a nice shaggy pom pom! You can leave it like
that, or give it a trim.

This one has had a quick trim - (I've left the "tying tail" on
so I can use it for a project)
So there you go! Quick and easy yes? Hope so!

Happy weekend friends xxx

Thursday, June 7, 2012

hammer hammer hammer!


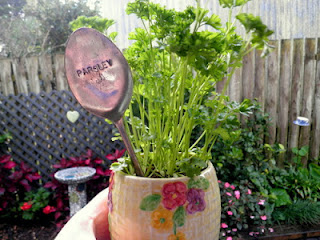
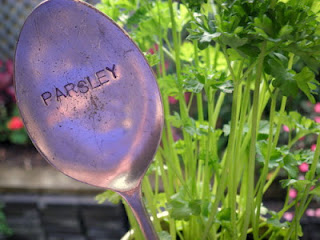
This is another idea stolen from Pinterest. You can find the pin with a link tutorial here.This is one of a small collection of markers I made for my mother in law for her birthday. I also thought it would be good to have one in use too, rather than just give a collection of spoons. I found that little vintage ceramic pot at a local thrift store, it's nice and sunny with cute flowers on it, perfect for grey and gloomy day like today.

Spoons I found at a local thrift store, I haven't found any lovely ones like the ones in the tutorial yet, fingers crossed though! The stamping set required for the letters I got from Trademe, from this seller.

I definitely need to have a set of these in my herb garden, so I won't be given a small handful of mondo grass when I asked for chives!

Wednesday, June 6, 2012

butter

I've been trying hard to do some real life "pinning", one such project is - wood butter. You can find the recipe here. It's gives new life to your wooden objects and it really works! The recipe is simple enough - bees wax and mineral oil. First problem here in NZ is we don't call it mineral oil, after extensive research and lots of questions at the chemist, turns out we call it paraffin oil, or liquid paraffin. Once I knew it's "NZ" equivalent it was much easier to track down, although we don't seem to sell it in such large quantities. The bees wax I found on Trademe, there is a whole heap of choices there and I chose a yellow block type one, rather than the white little pellets, just because they seemed more like bees wax to me.

Melt the bees wax and warm the oil, mix together and your done - simple. Now I have seen other recipes around that use olive oil, but I know that olive oil goes rancid and it's not advised to use it on your wooden objects, best to spend a bit more and use paraffin oil.

It was hard to get a good picture of the result today, grey and overcast. But trust me the results are really amazing, I kind of went crazy going around looking for more things to polish! The above bowl I picked up at the Salvation army, it looked like an unfinished wood turning project. It's Rimu and it's lovely now it's all polished up.

I filled one jar with the wax and had a little left over and I dropped a few drops of lemon oil in it. I really wish I had added it to the whole batch as it really smells devine.

Ok - A little update and some details I missed. - I used "Home Essentials" brand of paraffin Liquid sold at my local chemist. You can find the Home Essentials website here. They have a list of stockists to help you locate a local store.
- I've also just spoken to a helpful man from Home Essentials and he assures me that the paraffin liquid is food safe, so the polish or "butter" is fine to use on your chopping boards and wooden spoons.
- The liquid paraffin is sold in 200ml bottles so you need to add 48g of bees wax to keep the same ratio as the American recipe. the bees wax I had was in 50g blocks so I just used one of those.

Friday, June 1, 2012

part 1 - gathered


Gathered. The other weekend we were all recovering from some winter ills and chills. We had spent all weekend indoors despite the weather being beautiful. I decided on Sunday afternoon that perhaps a walk would be a good way to brighten our mood. The kids were far from enthused, they didn't like the idea of walking, so I came up with a reason. To gather some sticks for a project we've had in mind for a while. Suddenly they were all go and off we went.

I knew the perfect place, a quick walk from our house. There are many large eucalyptus trees and they seem to lose a lot of small stick-like branches. We soon had a bag full and after a few impromptu sword fights and lots of "knight" role playing we were off, taking the long walk home.

I can report that we all felt lots better once we returned home, including the "daddy" who stayed at home for a quiet nap.

Part 2 - Made (next week)